Training Agenda and Handout #
An agenda is where participants can find all the relevant information about the workshop, what they need to bring, what they will need to succeed, and how they can prepare on their own, before, during, and after the training. This section will highlight main elements and aspects that are needed to create a detailed agenda for the training.
The plan can be designed in various different formats, such as paper handouts or digital whiteboards such as miro boards, padlets. A digital agenda offers participants the possibility to ask questions and review the input of other participants at any time (for example, when they are preparing for the next session.), however it requires an internet connection. You can also sketch out flowcharts using draw.io.
What does an agenda need? #
The agenda should contain all the relevant information for the training. The time, dates, location or link to a video call (including instructions how to enter), requirements (in most cases a computer with QGIS installed and enough disk space to download the exercise data), as well as what the participants can expect, and what the trainers expect from the participants.
It is also good to include information on how the course is structured. If you are using the material from the training platform, you should explain how the platform is structured (i.e. the three main components - modules, wiki, and exercises - and where participants can find information).
The agenda should also provide an overview on what will be done on what day or time, so participants can contextualize each session into the larger training program. This can be done as a timeline for example.
Lastly, you should provide a link to the material (slides, handouts, exercise data) prepared for the workshop, so participants can find it quickly without searching through email or webpages.
The table below summarizes each item and gives a short description of what its content could be.
Information |
Description |
|---|---|
Time & dates |
Time & dates for the participants to plan their own working days around it |
Location or link to webinar |
Address or link for participants to quickly join the training |
Requirements |
What are the requirements for the participation (laptop, internet connection) and completion of the seminar (attendance, …) |
Expectations |
What competences are expected of the participants? |
Structure of the training/material |
Convey the structure of the platform. |
Timeline |
Provide a timeline for the course. |
Available material |
Add a link for participants to find and download all the necessary material |
You should adapt the agenda to your needs and the needs of your participants. For example, after each day, provide them with a question to reflect on what they have learnt or how they can apply their newfound skills.
Tip
You can also add blank sticky notes or spaces (in-person or digitally), where participants can write down their notes, findings, ideas or questions.
Agenda ideas #
Be creative when preparing the agenda, since you can use it to actively engage participants during the training and make them feel more secure to ask questions. Most importantly, trainings should be an open learning environment where the different needs of participants are acknowledged.
Below are some examples of graphical outlines of past training workshops:
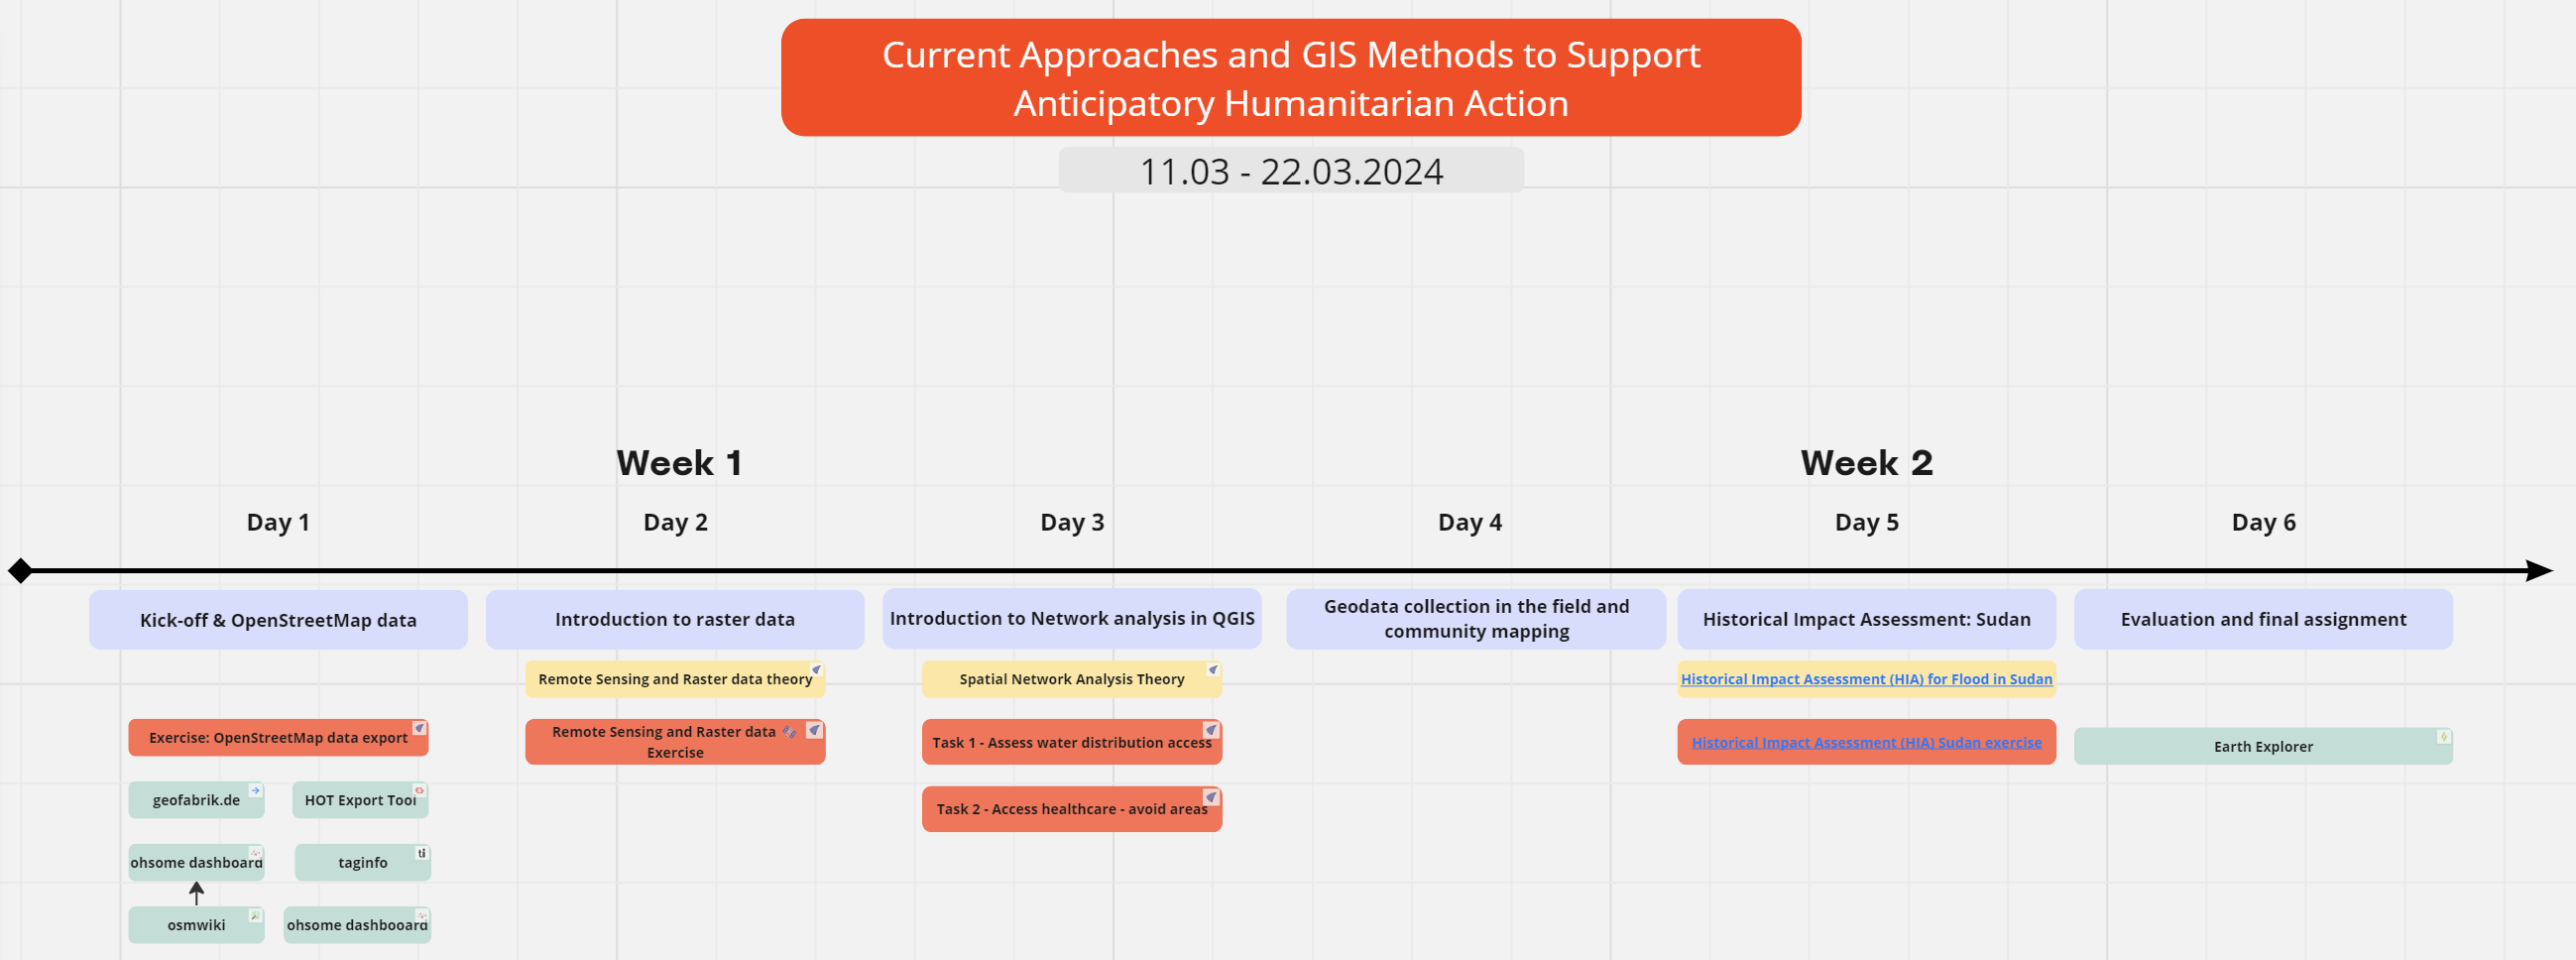
Fig. 62 Screenshot of a miro board used in a QGIS workshop in 2024.#