🚧 This section of the training platform and the entire content is under ⚠️construction⚠️ and may not be shared or published! 🚧
9.2. Plugin: Openrouteservice (ORS) tools #
9.2.1. Openrouteservice QGIS Plugin #
9.2.1.1. Install the Plugin #
Go under tab
Plugins
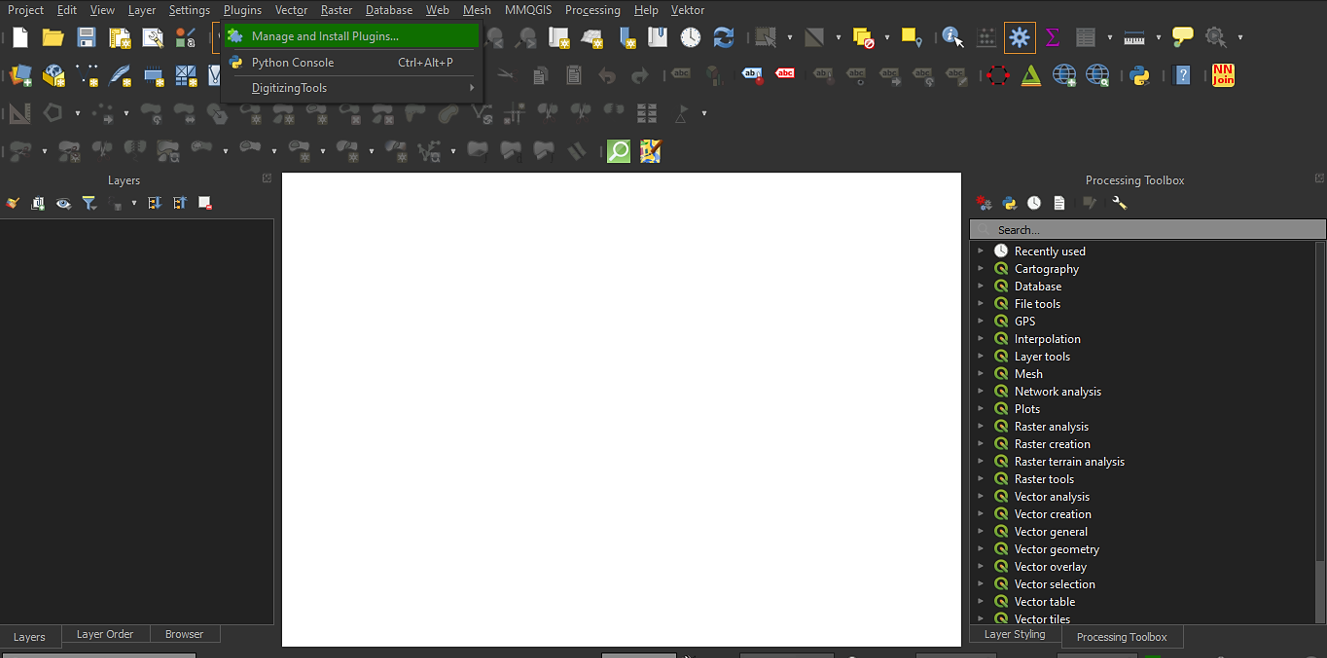
Fig. 9.3 Where to manage and install plugins Source: HeiGIT#
Click on
Manage and install plugins, a new window will open upSearch for “ORS Tools” in search line and click
Install plugin(right bottom)
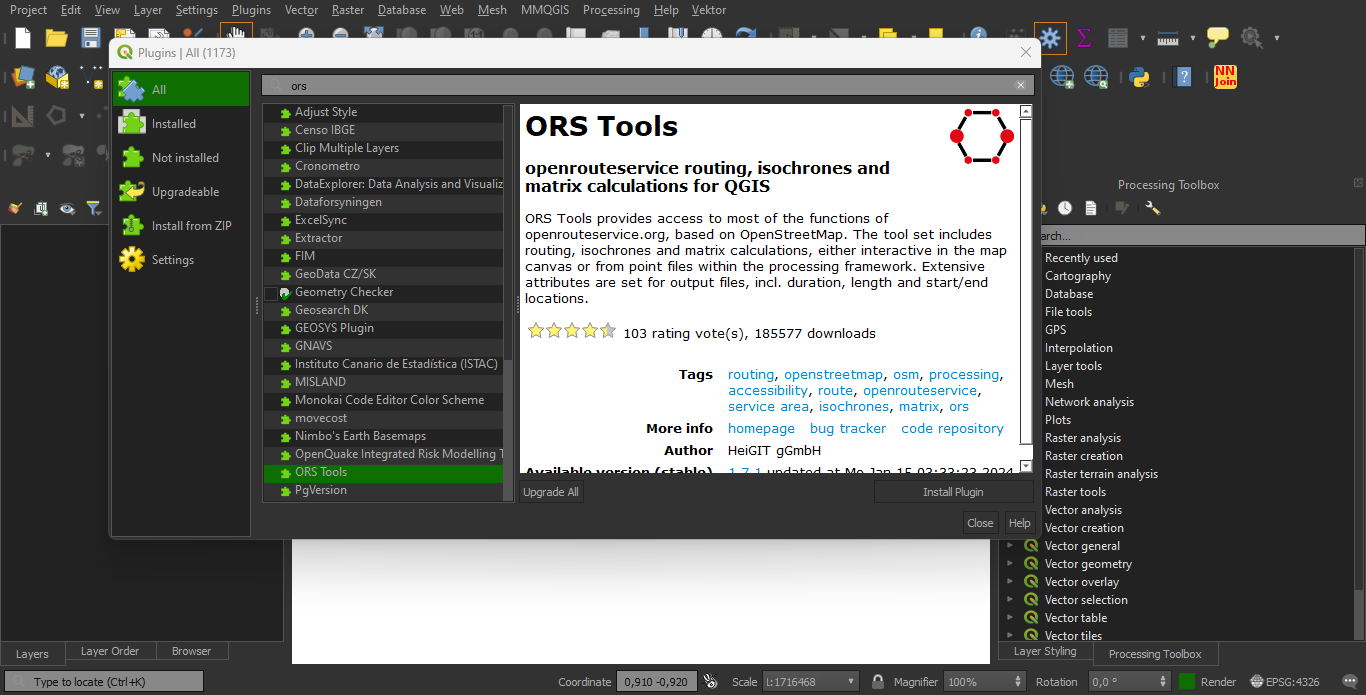
Fig. 9.4 How to install the ORS Tools plugin Source: HeiGIT#
Close the window
After a few seconds the plugin should appear under “Web” tab in QGIS as “ORS Tools”
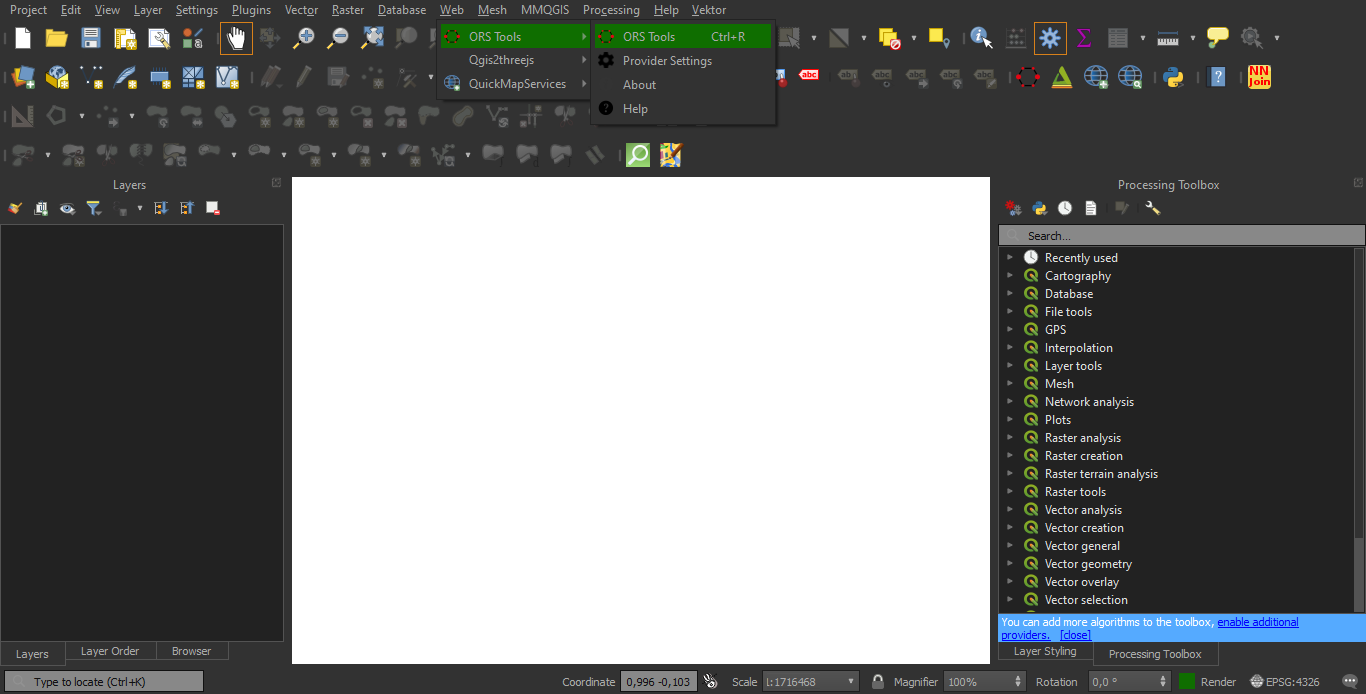
Fig. 9.5 Where to open the ORS Tools plugin (Source: HeiGIT)#
Open the “ORS tools” plugin - click on the ORS Tolls icon in the toolbar

To make use of the ORS tools, you first need to sign up. Therefore click
Sign Up
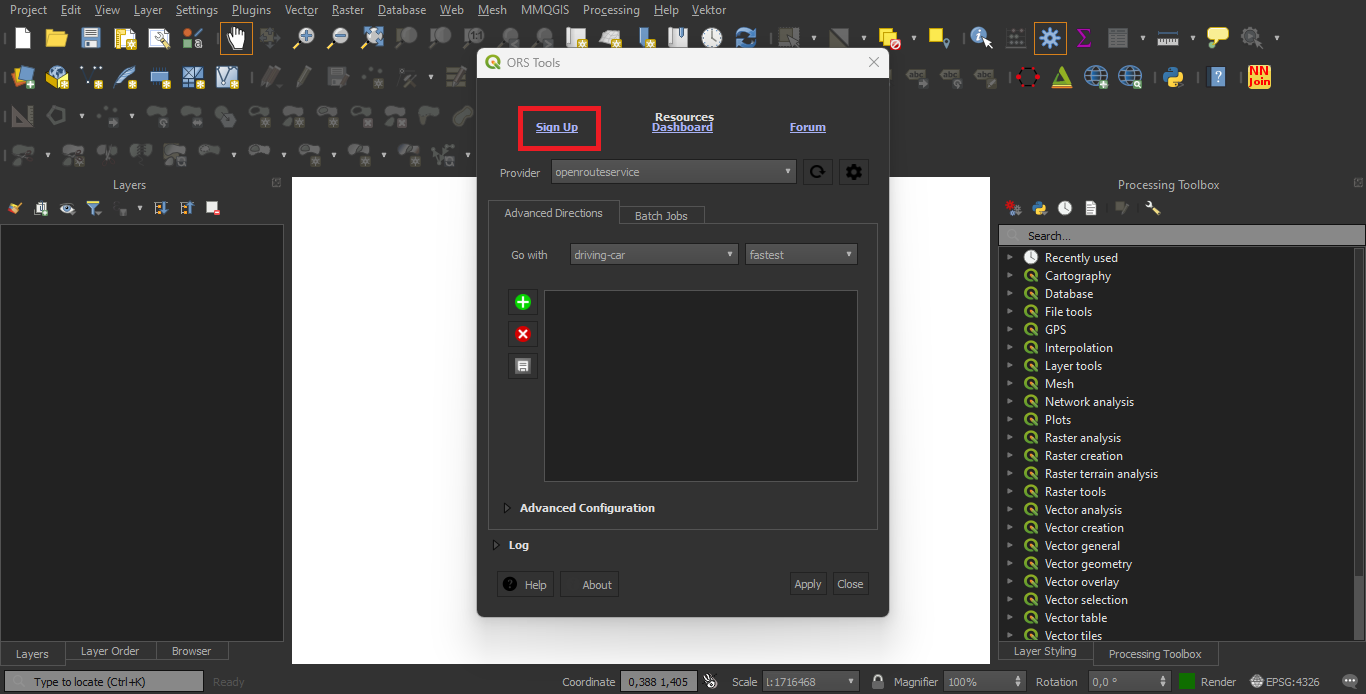
Fig. 9.6 Where to sign up for OpenRouteService Source: HeiGIT#
9.2.1.2. Sign up and setup #
You will be redirected to the Openrouteservice site, where you need to create a user account
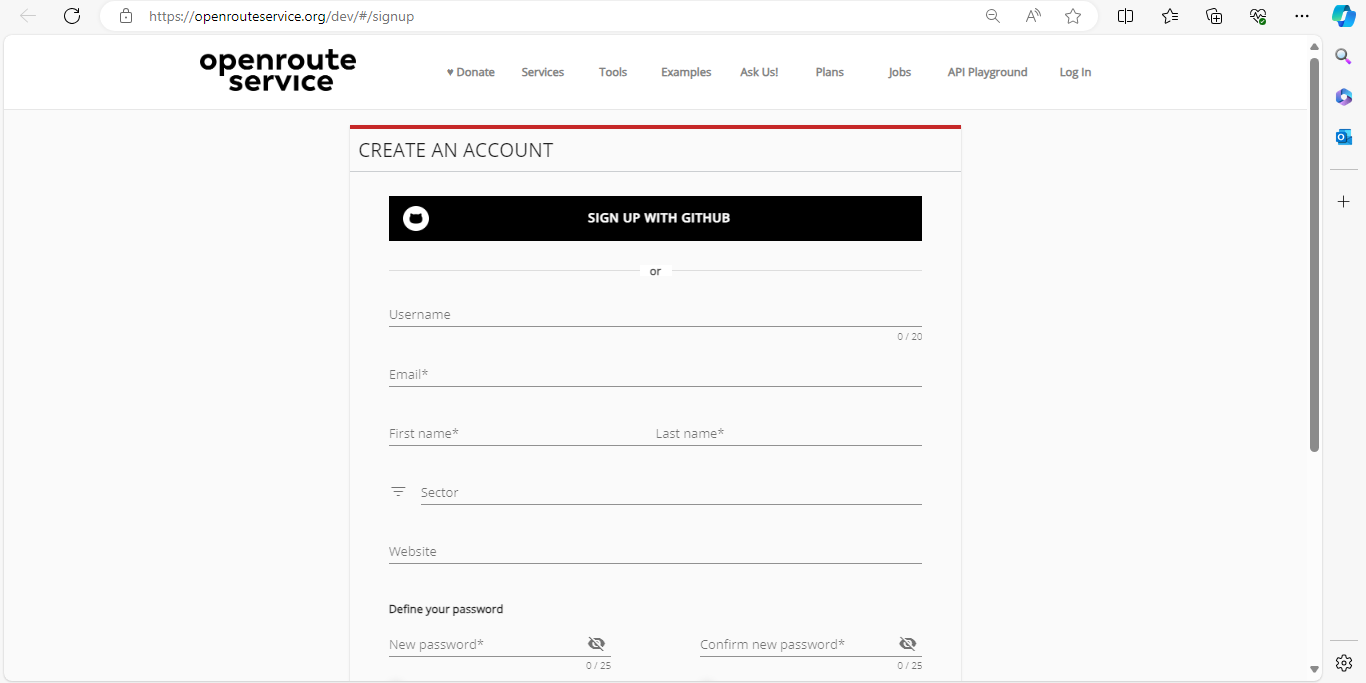
Fig. 9.7 How to sign up for Openrouteservice Source: HeiGIT#
After submitting your profile, a confirmation e-mail will be sent to your mail address
Please confirm your account
You are now able to create tokens (API keys) which allow you to run queries through the ORS Tools plugin in QGIS
Click into the field under “Request a token” and choose “Free”
Choose a “Token Name” in the field to the right and “Create token”
The token will directly appear above in the “key” field
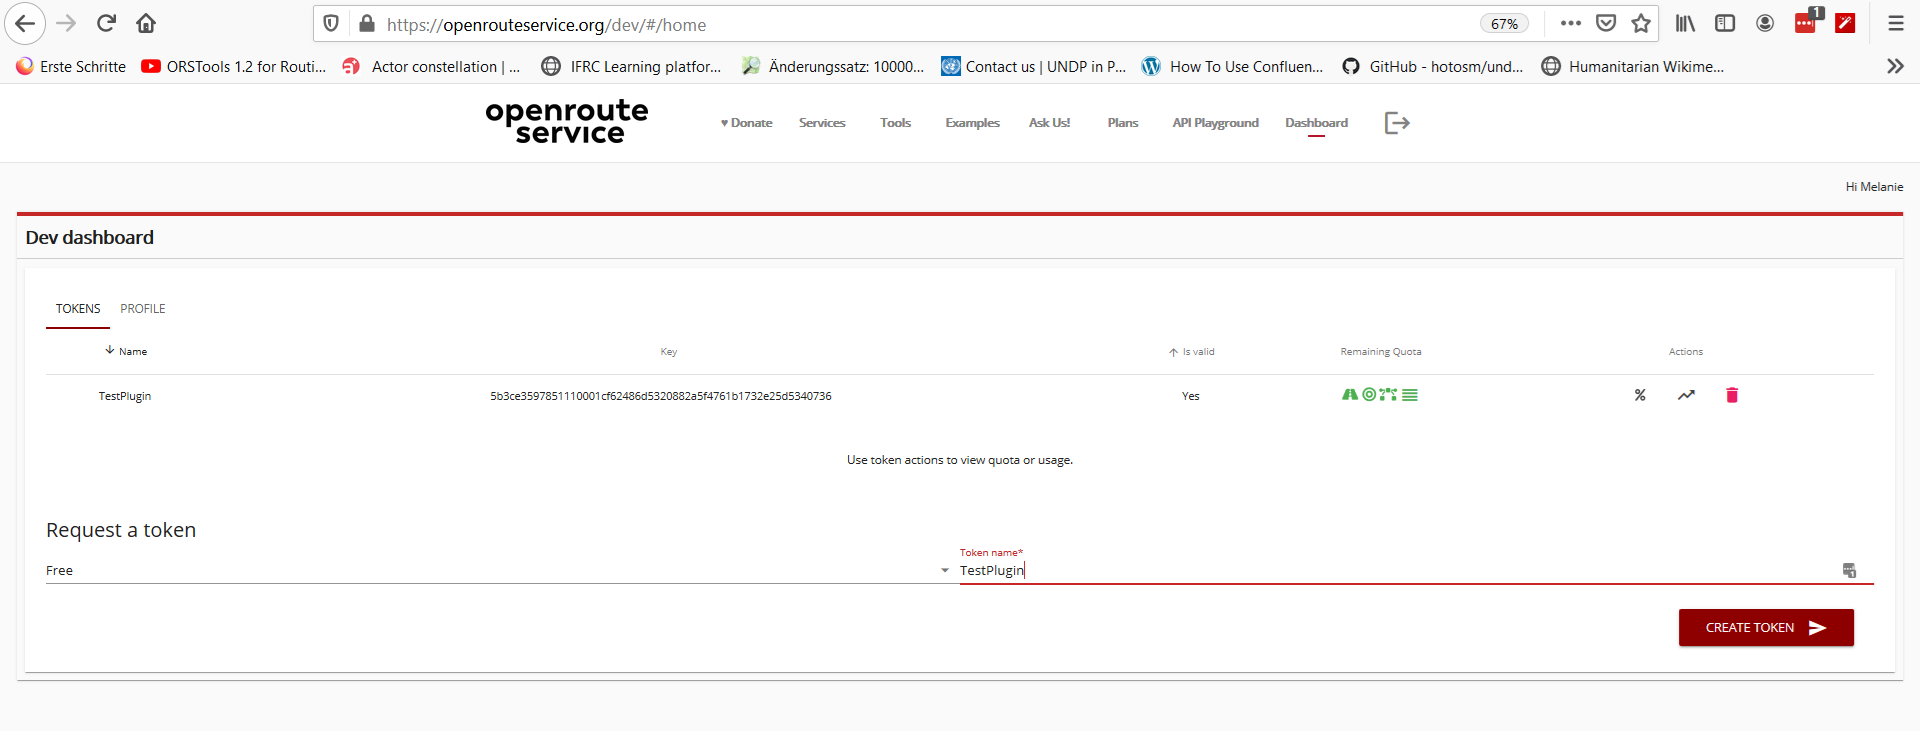
Fig. 9.8 How to create a token (API key) Source: HeiGIT#
Click on the token, it will directly be copied. You can now go back into QGIS for further setup
9.2.1.3. Configure the plugin #
In QGIS and go to
Provider Settingsin the ORS Tools window by clicking the settings icon (right next to „Provider field“)Add the API key you just created into the „API Key“ field
Add URL: https://api.openrouteservice.org into the Base URL field
(Potentially: Click
Addand enter „openrouteservice“ into the pop up window „Enter a name for the provider“)
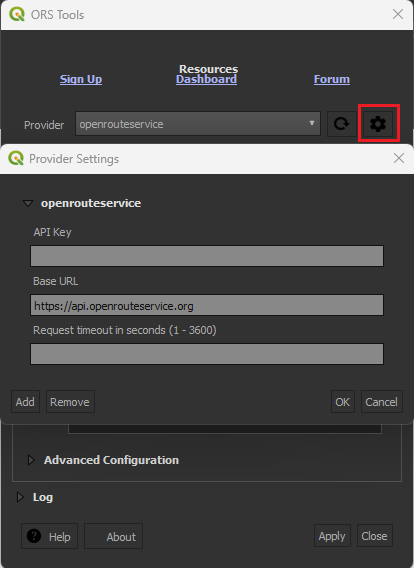
Fig. 9.9 Where to add API key (Source: HeiGIT)#
For further information: [GIScience/orstools-qgis-plugin]